


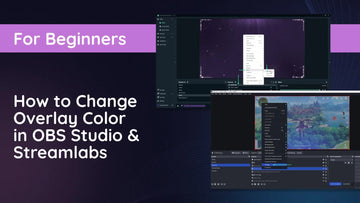
Creating a visually appealing live stream is essential to capturing your audience’s attention, and one way to achieve this is through color correction. Whether you're streaming games, vlogging, or hosting a live event, proper color correction can elevate the quality of your stream. In this guide, we’ll walk you through adding color correction in OBS Studio and Streamlabs, two of the most popular streaming tools available.
Table of content
What Is Color Correction?
Color correction involves adjusting the brightness, contrast, saturation, and other visual elements of your video to achieve a balanced and professional appearance. This process helps:
- Enhance your video’s overall look.
- Correct lighting issues or color imbalances.
- Match your camera feed’s color with other sources.
Now, let’s dive into how to set it up in OBS Studio and Streamlabs.
Adding Color Correction in OBS Studio
OBS Studio offers robust tools for video customization, including a built-in color correction filter. Follow these steps to apply color correction:
1. Open Your Scene and Source
- Launch OBS Studio and select the scene containing the video source you want to adjust.
- Right-click on the source (e.g., your webcam or game capture) in the Sources panel and choose Filters.
2. Add a Color Correction Filter
- In the Filters window, click the + button under "Effect Filters."
- Select Color Correction from the list and give it a descriptive name (e.g., "Webcam Color Correction").
3. Adjust Settings
- Use the sliders to tweak the following settings:Gamma: Adjusts the overall brightness.Contrast: Enhances the difference between light and dark areas.Brightness: Changes the overall luminance of the video.Saturation: Controls the intensity of colors.Hue Shift: Changes the overall color tone.Opacity: Adjusts the transparency of the source.
- Gamma: Adjusts the overall brightness.
- Contrast: Enhances the difference between light and dark areas.
- Brightness: Changes the overall luminance of the video.
- Saturation: Controls the intensity of colors.
- Hue Shift: Changes the overall color tone.
- Opacity: Adjusts the transparency of the source.
- Experiment with these settings until you achieve the desired look.
4. Apply and Close
- Once satisfied, click Close to save your changes. Your color correction filter will now be applied to the selected source.


Adding Color Correction in Streamlabs
Streamlabs, a popular alternative to OBS Studio, also provides easy-to-use tools for color correction. Here’s how to set it up
1. Access Your Source Filters
- Open Streamlabs and navigate to the scene with the source you want to edit.
- Right-click on the source and select Filters from the context menu.
2. Add a Color Correction Filter
- In the Filters window, click the + button and choose Color Correction from the list.
- Name the filter to keep your settings organized.
3. Customize the Filter
- Adjust the sliders for Gamma, Contrast, Brightness, Saturation, Hue Shift, and Opacity as needed.
- Preview the changes in real-time to ensure the settings complement your stream’s aesthetic.
4. Save Your Changes
- Click Done to apply the color correction filter.


Tips for Effective Color Correction
- Use a Reference Image: If possible, use a reference image or video to match your colors accurately.
- Don’t Overdo It: Avoid extreme adjustments that can make your video look unnatural.
- Monitor Lighting Conditions: Ensure your lighting setup remains consistent to avoid frequent readjustments.
- Test Your Stream: Conduct a test stream to see how the color correction looks on different devices and platforms.
Conclusion
Color correction is a simple yet powerful way to enhance your live stream’s visual quality. Whether you’re using OBS Studio or Streamlabs, the process is straightforward and can make a significant difference in how your content is perceived. By following this guide, you’ll ensure your stream looks polished and professional, helping you stand out in the competitive world of live streaming.
Happy streaming!